![]()
![]()
Gunnar Nymann from Chouan Kennels in Denmark, is a master at making a PBGV look great for the show ring, by keeping the natural casual look that is synonymous with the breed, but still showing off the PBGV's natural outlines and features. He does almost all the work on the dogs by hand plucking using scissors only on the feet.
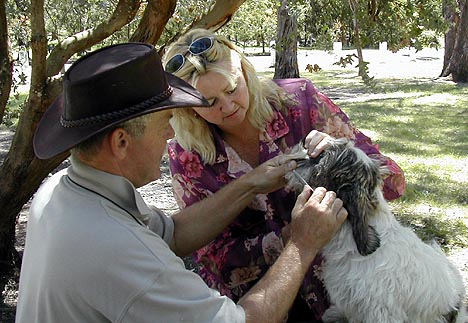
Gunnar is generous with is time and always willing to share his knowledge of grooming with anyone who asks.
He believes an untouched dog that needs to be made ready for the show ring, should have the main work done 6 weeks before it is shown, then it is easy to just keep the dog neatened up. He has kindly let me use his photographic grooming educational presentation to show how this is achieved.
|
The Project - How to turn a dog from - |
|
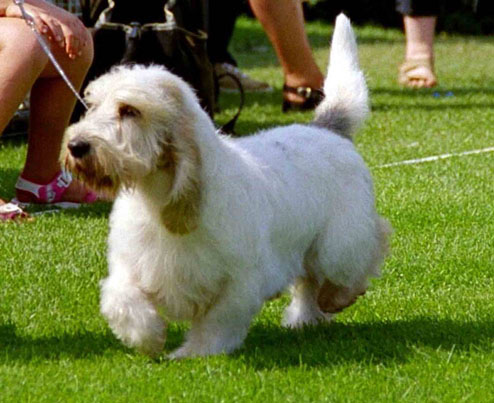
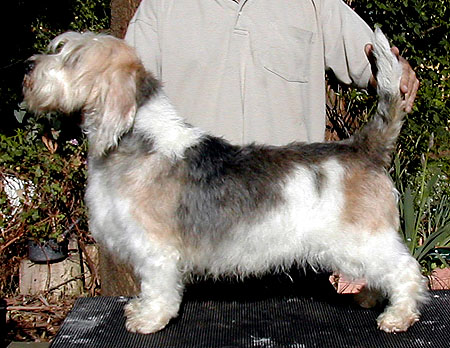
The Picture on the left to . . . . . . the Picture on the right |
|
|
|
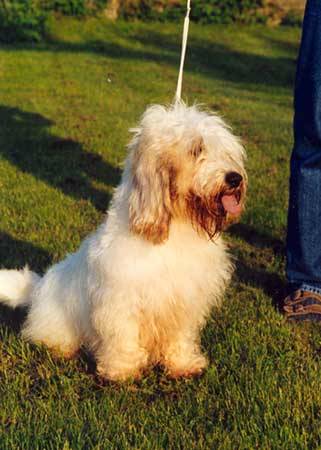
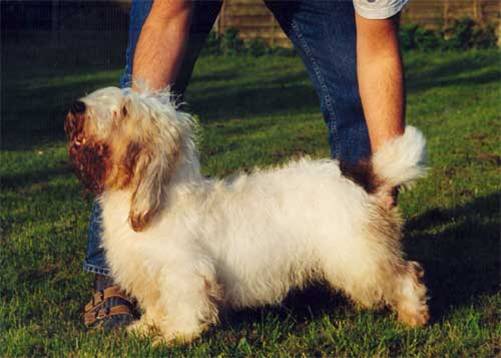
This is the transformation is of a dog that has had its coat neglected and so lost all the outlines of the breed. Note in the picture on the right, after heavy hand trimming of the coat, six weeks later the same dog had good lines and definition about him, but retains the breeds casual appearance.
|
BEFORE. . . . . . . A dog with 12 months of coat neglect. |
|
|
******Most important ****** ............ the first thing one needs is a clean dog!
|
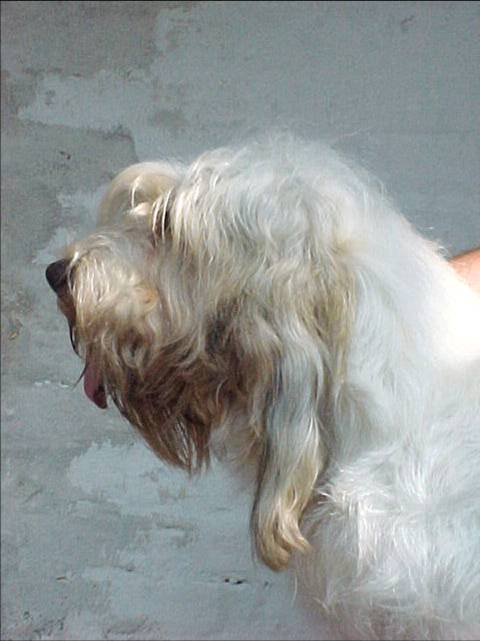
- THE HEAD - |
|
Before |
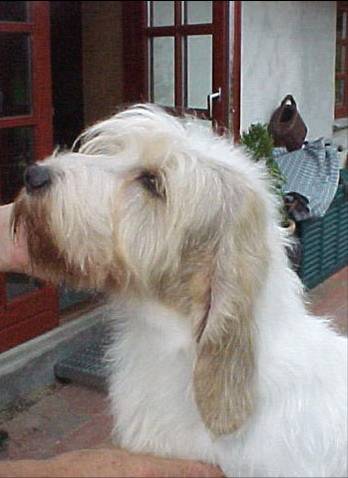
After |
|
|
|
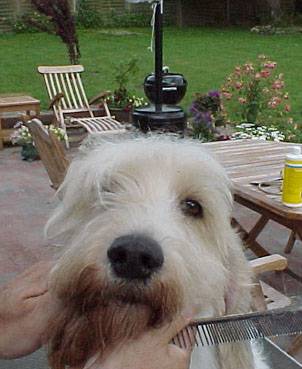
Notice in the 'Before' photo the dog looks heavy headed, by cleaning away the long unwanted hair, you can see the correct proportions of the PBGV's well balanced head.
|
Now lets begin |
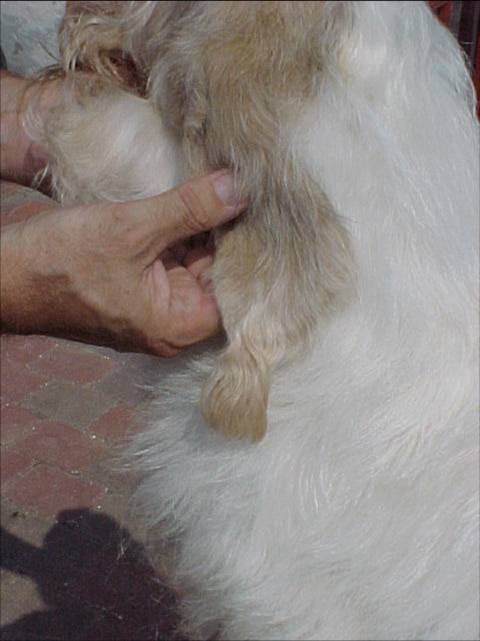
Gunnar first combs all the matts and tangles out of the coat, as you can't work on a coat that is not clean or easy to comb. He uses a steel comb for almost all of his work and all the hand plucking is done by combing the hair out straight and plucking out all the hair that is longer than the shortest hair in the shank you have combed out. If you want to shorten any particular area, you comb the hair out straight and then tease it apart so that the hair is not in clumps which will hurt the dog if you pull it all out at once, holding this hair between the forefinger and next, at the approximate length you want it, you then pluck the hair back to that length with your other hand. (You will find there are not a lot of areas on the dog that don't have the shorter hair at the length you want to pluck the longer hair back to.) Once you have taken this hair back to the main body of shorter hair for instance on the legs, you will find that the hair looks thicker and springier as the long heavier hair is not weighing it down.
|
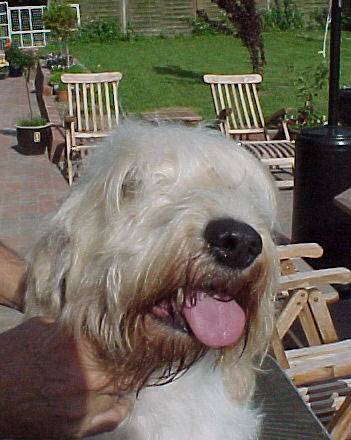
The Face |
|
|
|
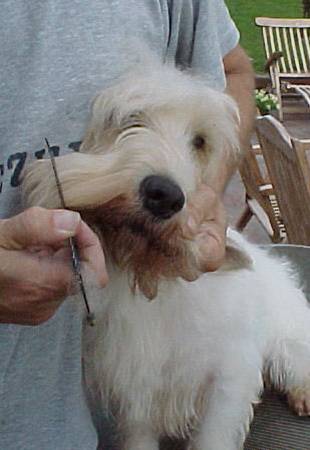
Notice the difference in the photo on the right as after Gunnar has worked on one side of the face, the dog now has his eye showing & the shape of the skull is becoming noticeable. He used his forefinger and thumb to pluck the hair from in front and under the eye. He has also shortened the hair around the skull over the top of the ear and down the cheek.
|
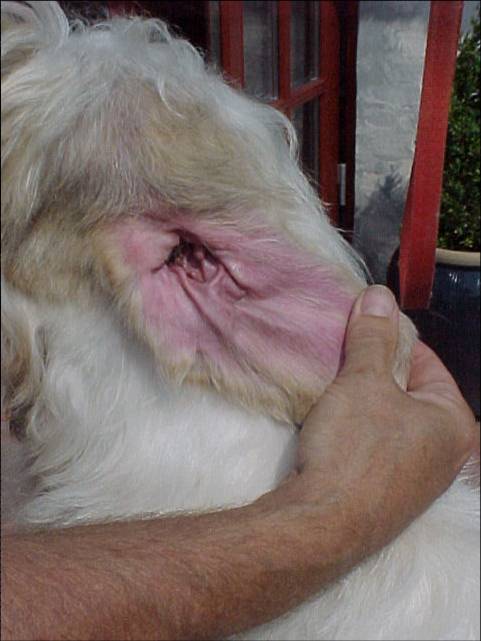
The Ears |
 |
 |
 |
 |
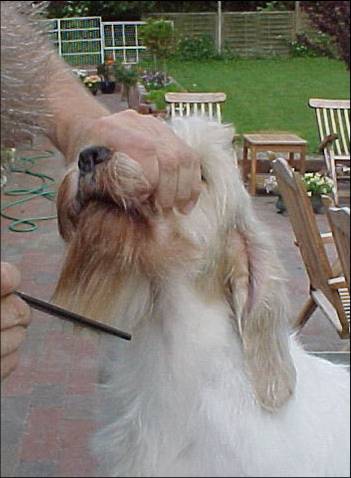
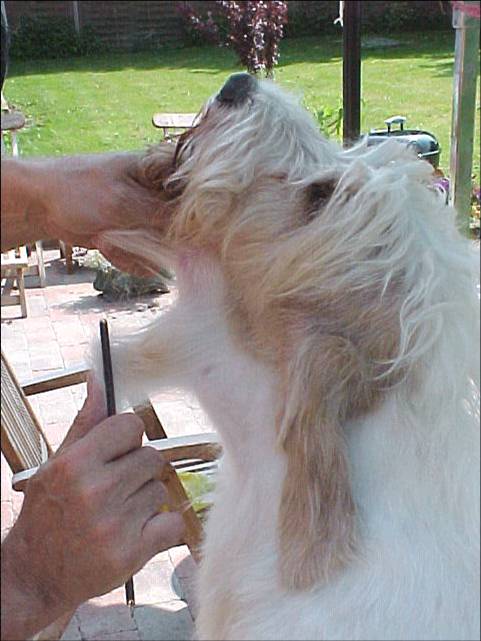
The first photo shows the ear, with heavy hair all around it and on the inside of the leather. This makes it hard for the air to circulate around and get inside the ear canal, and in turn for dog's ears to dry out properly. This can be one of the reasons dogs get ear infections. The second photo shows the ear after all the hair growing inside the ear canal and under the leather is removed. The third photo shows Gunnar, beginning to pluck the hair from around the edges of the ear to shorten it. Notice in the forth photo the ear almost finished but with a little clump of hair yet to be removed at the bottom, which shows just how much longer than the leather the hair grows which in turn makes the ear look longer than it should.
|
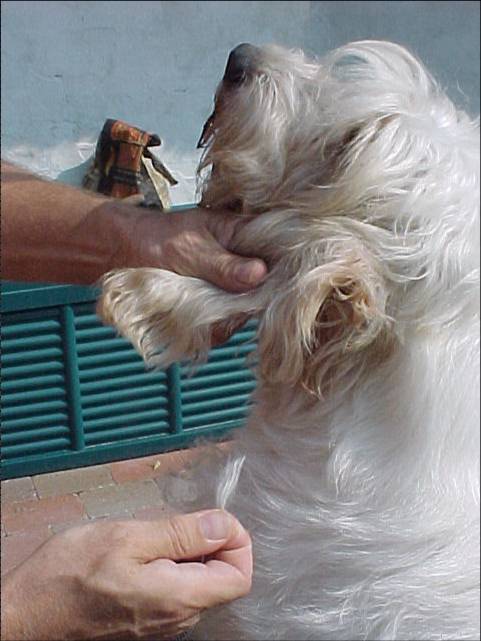
The Beard |
 |
 |
 |
The beard now gets shortened, this helps balance the head and keeps the dogs face much cleaner. Gunnar starts by shortening from the side, then under the front of the jaw. He then holds the shortened front of the beard and works behind back to under the throat, so that there is a definition between the beard and the neck.
|
The Skull |
|
|
The skull and where it joins the top of the neck now needs to be more defined. Gunnar first combs all the hair forward from just infront of the ears. The remainder he combs up and then shortens. This finishes off the work need to show the shape of the PBGV's head.
|
THE BODY |
| Before | After |
 |
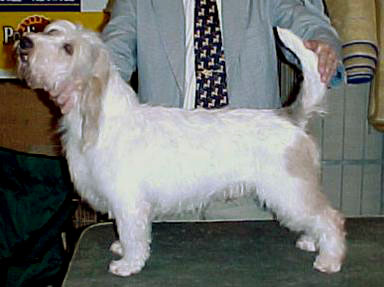 |
You will notice that the dog looks to have more length of leg in the finish photo on the right, this is because, Gunnar has pulled out (by finger and thumb) all the dead and unwanted hair over the body, which has in turned shortened all the coat under the belly. Now you can see the correct balance of the dog. Even though the dog looks over-trimmed for the show ring,( as the photo on the right was taken the next day), I think most people will agree, this dog looks MUCH better trimmed (even heavily as he is in the photo) and looks as though he will be much easier to keep tidy now he is finished. .......... Read on to see how this was achieved.
|
The Front Legs |
 |
 |
 |
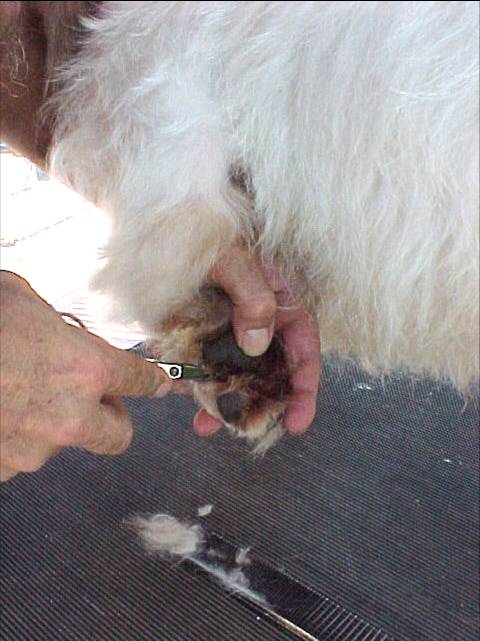 |
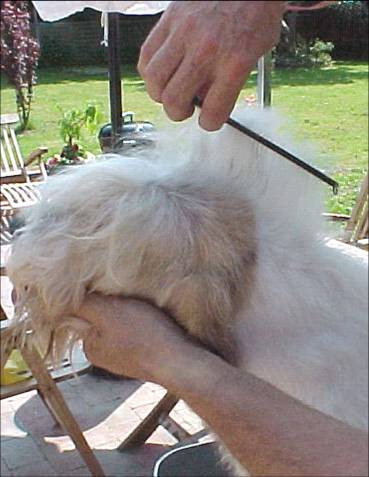
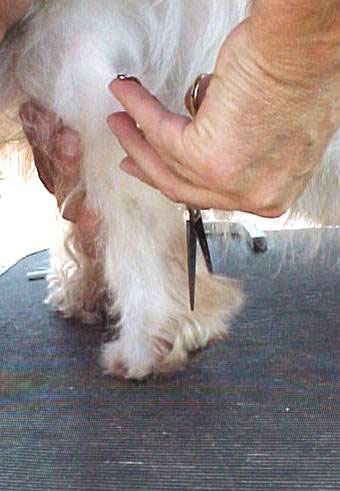
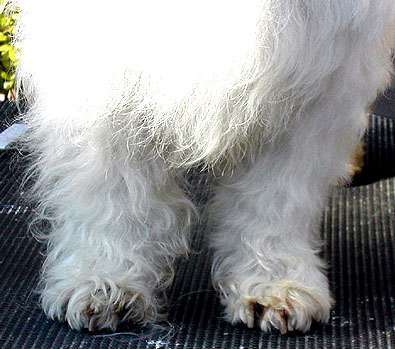
Trimming the hair on the front legs of the dog is done exactly how it is done else where on the dog. The hair is combed out straight from the column of the leg and then the longer hairs are plucked out to the length of the shorter ones in the main body of the hair on the leg. i.e. they are all taken back to the same length. (This is done in sections, as the hair is all combed to the front and worked on, then to each side and worked on then to the back and worked on). This makes the hair stand out naturally on the legs without the longer hair dragging it down. After brushing the hair out at the pasterns Gunnar holds the leg and using straight bladed scissors, he cuts straight down. This gives the foot more definition. He then uses a small pair of scissors to clean the hair out underneath the foot between the pads.
 |
 |
 |
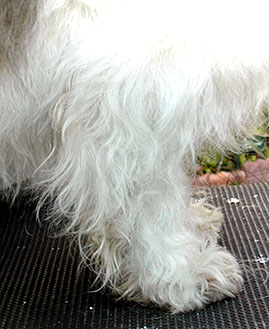
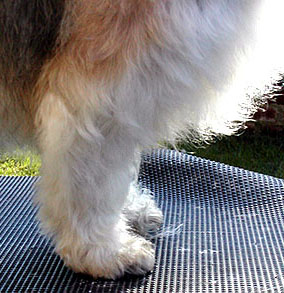
These are photos of another dog's front legs that Gunnar has trimmed that show the difference before and after more clearly. Notice the photo on the right shows one leg neatened up and the other not touched yet. Also notice in the middle photo, Gunnar has shortened the hair in front of the top of the leg and this shows off the pro-sternum of this dog more.
|
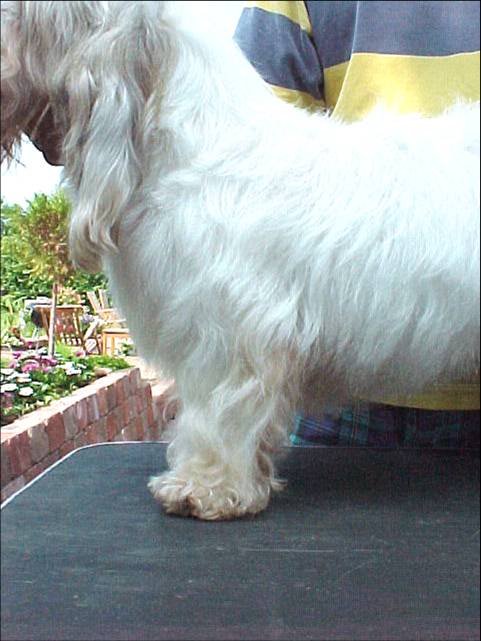
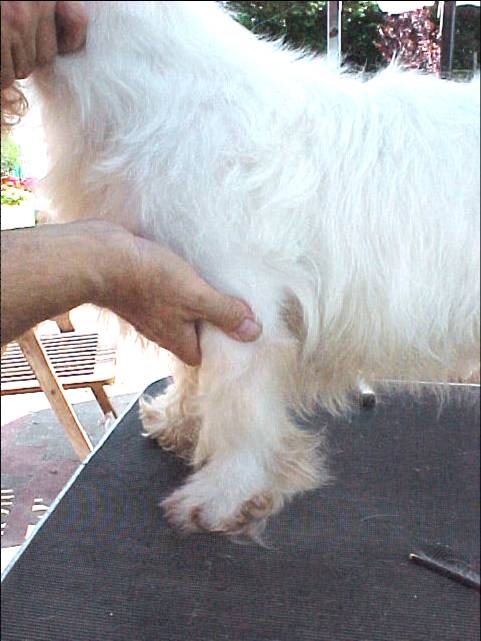
The Hind Legs |
 |
 |
 |
 |
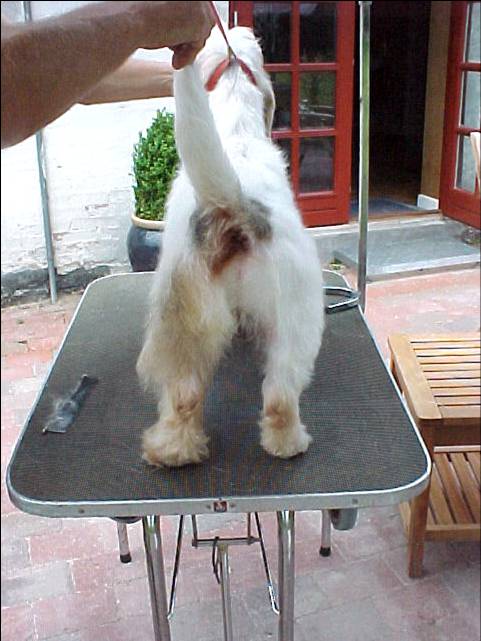
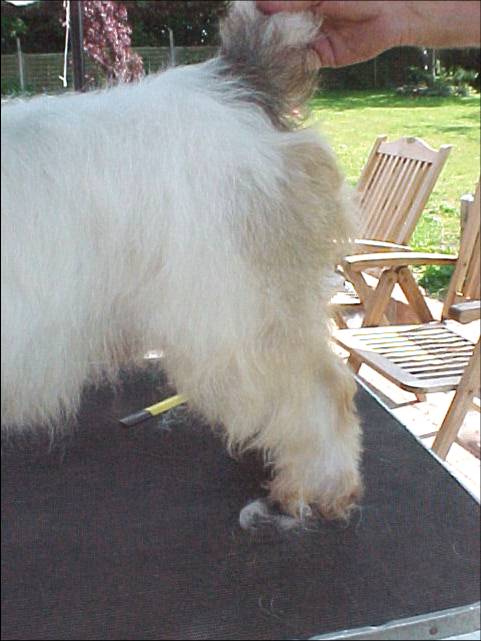
The hind legs are done exactly the same as the front, notice the more definition in the hock of the leg that has been done as compared to the other that hasn't in the second photo. Looking at the side photos you will notice that the stifle now looks stronger, wider and more turned once all the excess long hair that is hiding it is removed.
|
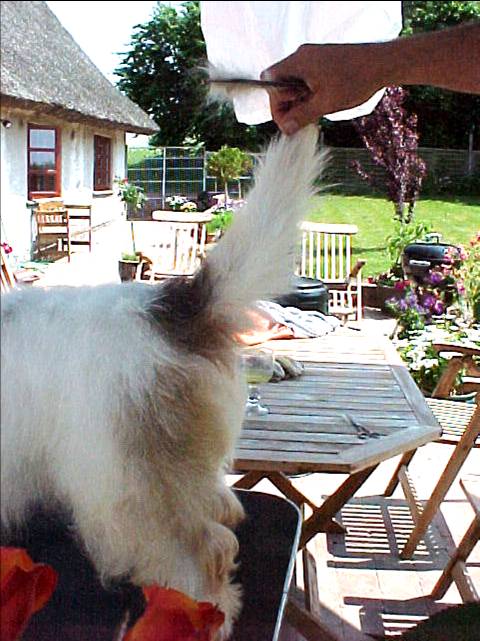
The Tail |
|
|
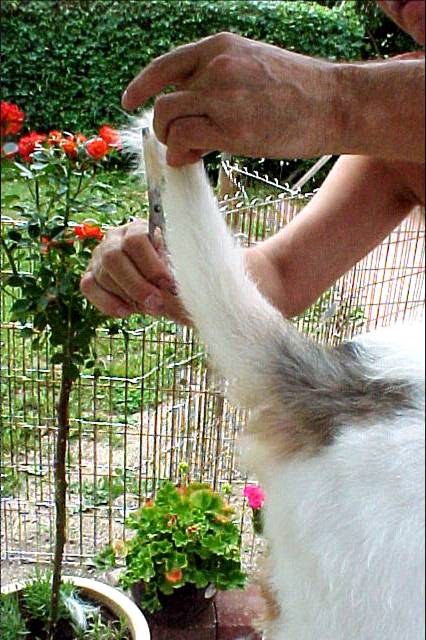 |
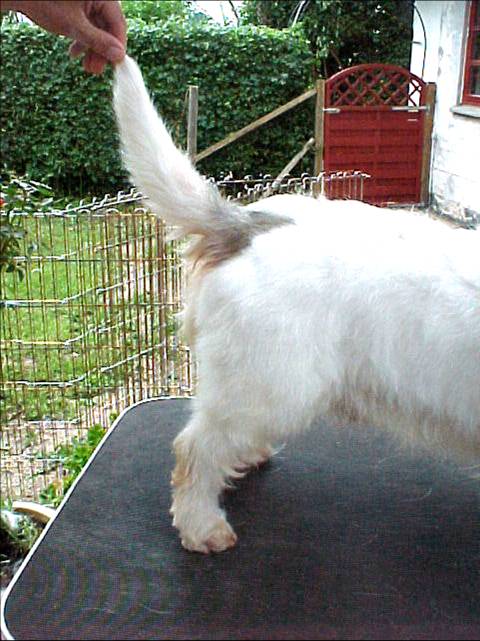
The tail should look a little like a carrot when finished. Gunnar holds it by the tip and plucks all the long unwanted hair from it, then using thinning scissors cuts the extra length from the end, shaping it in a scimitar shape down into the main part of the tail.
|
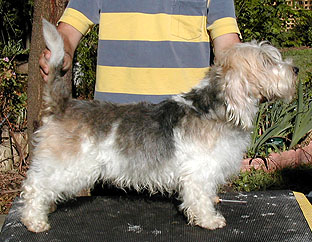
The Finished Picture |
|
|
 |
The finished dog - One day after the trimming on the left and looking wonderfully tousled and natural six weeks later.
Following is another example of a before and after trim done on a dog by Gunnar.
|
|
 |
As you can see it is a very time consuming job to get your PBGV looking good for the show ring, and the amount of work will depend on the quality and amount of coat your particular dog has and how long you have left it before you decide to get him ready for the show. But once you have your PBGV in order, then it is easy to just continue to pluck out the odd hair as it grows. The the moral to the story is not let your dog get to the extent that it is a major job to make it look great in the ring. You know, fabulous, but looking as though it has not had a thing done to it, except just a quick brush, before you ran into the ring!!!!!